Smart Mirror Senior Design 3: Skin Extraction
28 Apr 2018
The senior design project I have been working on in school is a “smart mirror”. Equipped with a thermal and RGB camera, its primary goal is to analyze a user’s face and give health feedback. The subsystem I was responsible for was image processing and my goal was to analyze user images to obtain health metrics. In this post, I go over extracting the user’s skin (from images, of course).
Skin
If you take a picture of someone and want to do some image analysis of their skin lesions (normal stuff, right?), first you have to determine which part of the image is their skin. A major requirment for this process is that it has to be more flexible than simply providing a fixed range of color values meant to include all human skin types.
Process
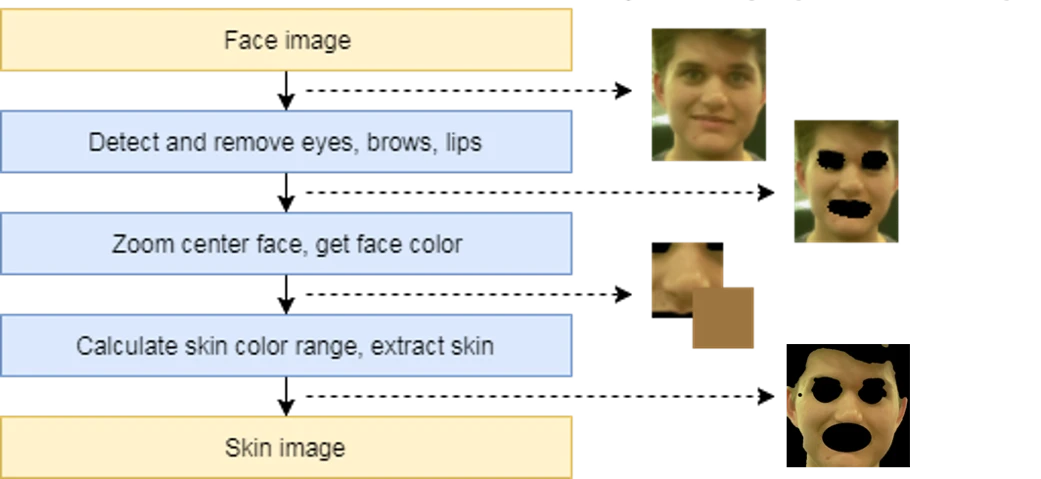 Skin extraction process steps.
This is another process inspired/adapted/straight-up-coped from a paper. The idea behind this skin extraction process is that if you know where the face is, then you have an approximation of what the rest of the skin looks like. This works well because face detection is robust, easy to implement, and works for all skin colors. The process can also be improved by detecting and removing eyes and mouth before the skin color range is calculated.
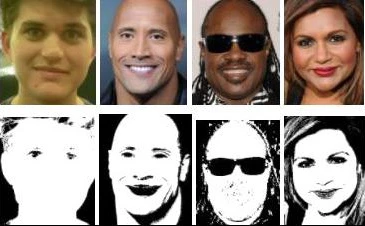 Sample results with well-liked celebrities (mouth and eyes not removed).
Corner Cases
This process will still include any background areas or hair that are too similar to the skin color of the user. Teeth are also kind of hit-or-miss, but something tells me no one will be smiling at a smart mirror. In addition, accuracy of skin detection depends on the accuracy of face and face feature detection. I used OpenCV’s Haar Cascade classifiers for detection, however they were not that accurate, especially for mouth and eye detection. If I was looking at this again, I would look at alternatives such as facial landmarks with dlib .
Github for C++, OpenCV code.